

If you plan to play alone or with your friend or create a private dedicated server, you came to the right place. I will try my best to explain on how to setup a private/public server for Hellion.
Hellion is a space survival game which was released last Friday, 24th Feb 2017. More details here: Hellion Steam Store Page
Warning! Please proceed at your own risk. Some computing skill is required. If you are clueless or have no idea at all, don't! Get someone else to do it

for you. Or join existing servers.
Server File Installation Using Steam CMD
- You need a Windows based PC or server. Preferably 64 bit. 32 bit is fine if you are playing alone or with few friends. So far the dedicated server program use up about 90 ~ 100MB RAM.
- Download a SteamCMD from here: SteamCMD Download
- Extract the SteamCMD to a folder and double click the steamcmd.exe
- A pop up will appear. Something like this
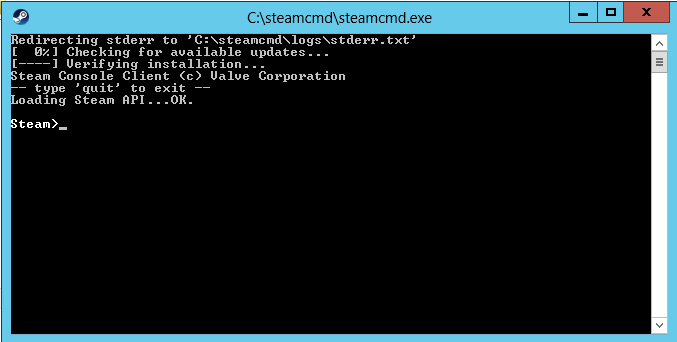
- Type login anonymous then press enter
- Then type force_install_dir d:\hell\ where d:\hell\ can be a directory of your choosing then press enter
- Then type app_update 598850 then press enter. SteamCMD will then start allocating disk space and download the dedicated server files.
- Once done (it will said app 598850 installed), type quit to exit SteamCMD.
Hellion Pre Launch And Configuration
- Once installed you will have a folder with content like below
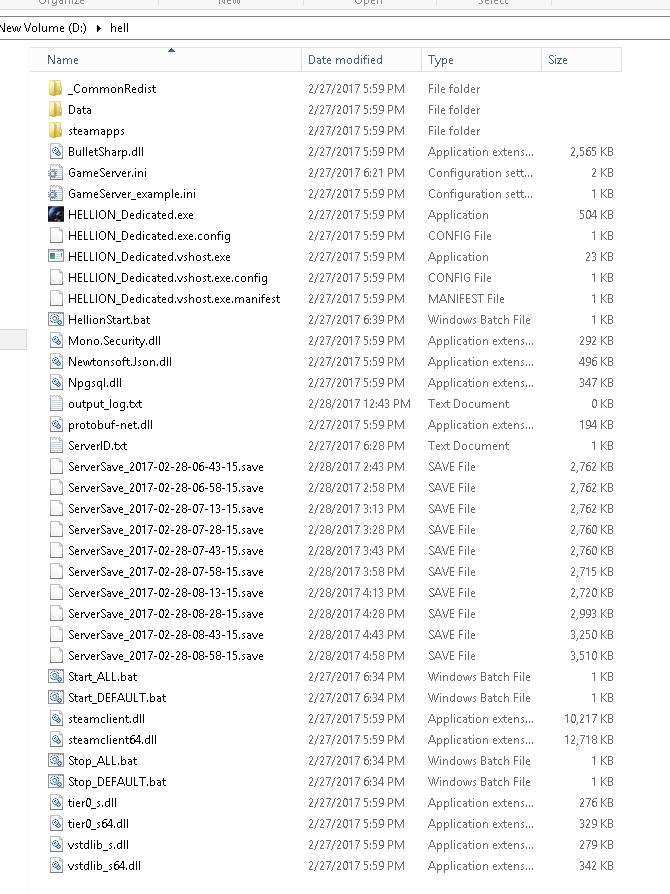
- Well, a bit different actually since the above is a done server setup. Anyway, run everything in the CommonRedist folder. This will install Visual C++ Runtime and also dot Net library.
- Then open up GameServer_example.ini using a notepad or any text editor you have.
- You will see something like this or something similar.
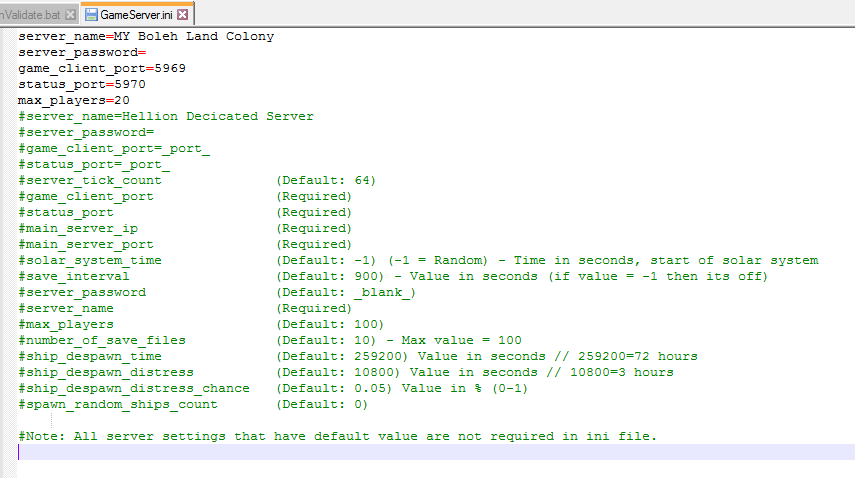
- Change server_name= to anything you want your server to be called to. This will be listed in the game multiplayer lobby.
- Put in a password in server_password=YourPasswordHere if you want to make other people unable to join your server without knowing your password.
- Put in ports number in game_client_port=xxxx and status_port=xxxx . The ports number can be a unique port numbers depending on your PC or router availability. If not just use same value 5969 or 5970. These port numbers need to be forwarded later in your router to allow people to join in and also for the Hellion lobby server to list your server (if not, it may show up as Offline or not at all).
- Put in max_players=XX to limit number of players or no at all. This to control number of players connected to your server at a same time. More players = more CPU power and RAM needed,more bandwidth required = lag or performance issue if insufficient
- The rest of parameter, well some of it you can tweak (don’t forget to uncomment or delete #) but at your own risk. The developer hasn’t release any information on those settings yet but some of it pretty much self explanatory.
- Save the config file/text file as GameServer.ini
- Then open up a new file in a notepad again or text editor and type this in: HELLION_Dedicated.exe -scan
- Then save it as Hellion.bat
- After that, run Hellion.bat by double clicking it. You maybe seeing some warning or UAC thing or other stuff, just press yes to continue or ok to run the batch file.
- Some popup will appear then disappeared. You will see additional files start appearing in the game folder.
- That’s it. You are done with pre launch and setting.
Router Port Forward and Windows Firewall Setting
- Ok, this is a bit tricky since it vary from each router model. You need to access your router setting screen to perform port forward or set your server as DMZ. I’m not going to explain this so you better google howto base on your router or modem model or visit Port Forward.com. You need to put in the port numbers above (5969 and 5970 but some video i saw put in 5968 too. well you can forward that port too) and the local ip address of the server (this can be something like 192.168.x.x). If you host on datacenter like I did, I use a config page provided by the datacenter service provider to do port forward. Contact them if you are not sure.
- Port forward done then on to Windows Firewall setting. A lot of people forgot to do this so people cannot connect to your server.
- Open the Windows Firewall settings. Look for something like below. Click the Allow an app ….
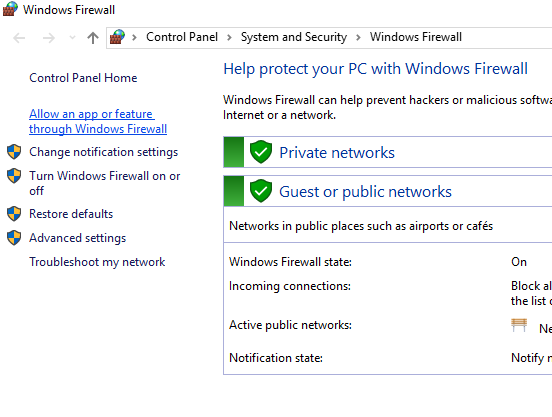
- Then click Change Settings and then click Allow Another App
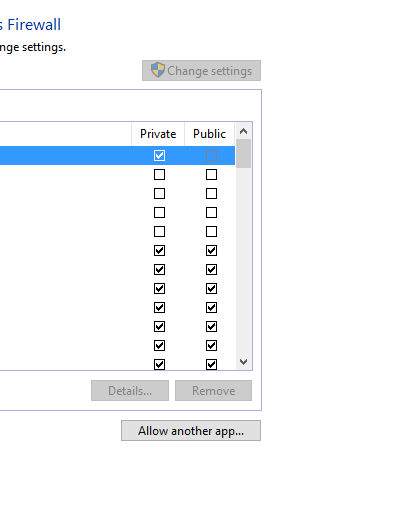
- Click Browse then browse to the server folder then select HELLION_Dedicated.exe (I used 7zip as example!)
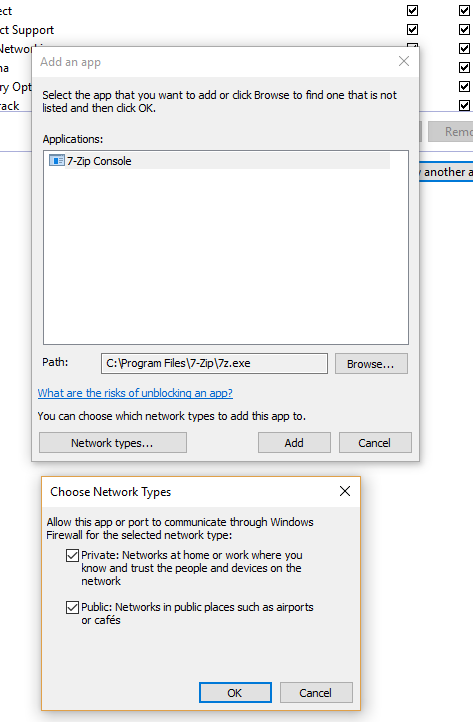
- Click Network Types at the bottom then tick both Private and Public then Ok. Then finally click Add then Ok button. Firewall settings done.
- Things to note if your server still shows up as Offiline
- Make sure that the port forwarding of 5968,5969,5970 is done correctly pointing to correct server IP address. You can try using other port numbers if it didn’t work.
- If you are sure you did the port forward correctly, windows firewall set correctly, check if you have an anti virus program. Modern anti virus program came with its own firewall program and this may be blocking the incoming connection. Refer to the anti virus website or manual on how to the firewall pass.
- Lastly, due to lack of IPv4 IP address, some ISP providers assigned their subscriber with a local private network IP and use a gateway as connection to the Internet (Maxis did this). In this case, incoming connection cannot be port forwarded. How to check if you are in this category? Check your router for WAN IP. If you are assigned 10.X.X.X, you are on the ISP private network. You need to contact the ISP for a public IPv4 IP. This IP is permanent and always point to your router. Now your port forward should work.
- Do take note that if you are trying to connect to your server using the same internet connection that your server is hosted or on, you will have an issue because your game client use your public IP to communicate with server which also use same public IP. Which mean when the server try to send the data to the client, server will receive same data to it again. Mean the data cannot be send to your client. Argghhhh, you should get the gist. It’s like there is a mirror in place. So to play you may need a different internet connection until dev develop the client so that it can bypass using the public IP (use LAN IP) for connection.
Start The Server Already!
- Go back to the server game folder. Look for Start_All.bat. Double click on it. Your server is now running.
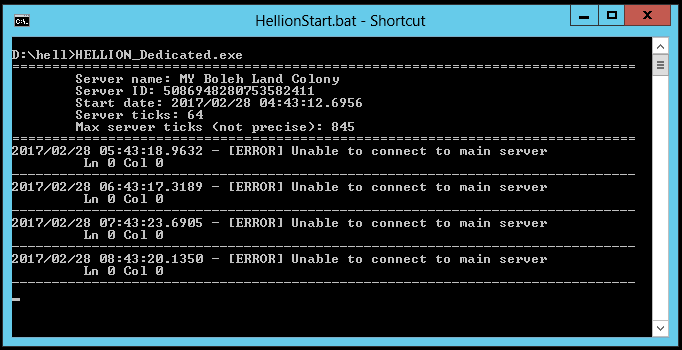
- Launch your Hellion game client and try to connect. You will see your server in the list when you click Play.
Stopping and Updating Server
- To stop the server, double click on Stop_All.bat.
- To update the server, create a batch file using a notepad or text editor and put in these lines. Save the file as HellionUpdate.bat . Replace d:\hell\ with server folder location and c:\steamcmd with steamcmd folder location.
echo off
c:\steamcmd\steamcmd +login anonymous +force_install_dir d:\hell\ +app_update 598850 validate
exit
- When you see an update release by the developer, just stop the server then run the batch file. Do take note that sometime the developer roll out a patch which will require the server file to be wiped so you need to delete all files then run the batch file again. Make sure to save a copy of GameServer.ini, the Hellion.bat and HellionUpdate.bat is a different place before you perform the wipe. You may need those file for reinstallation.
My Boleh Land server is a server I hosted for Hellion
Thanks! Worked perfectly!
You are welcome 🙂